How to create a drop shadow in Canva.
In this post I will take you through two ways of creating a drop shadow in Canva. If you don’t have time to learn this at the moment but in need of a drop shadow that you can use straight away. Then no problem. you can download and use these for your projects

I’M IN A HURRY. Get the free drop shadows from this tutorial now and learn later.
Subscribe to our email list & get the free drop shadow files. This will unlock the file and subscribe you to our email list. You can unsubscribe at any time.
What is a drop shadow?
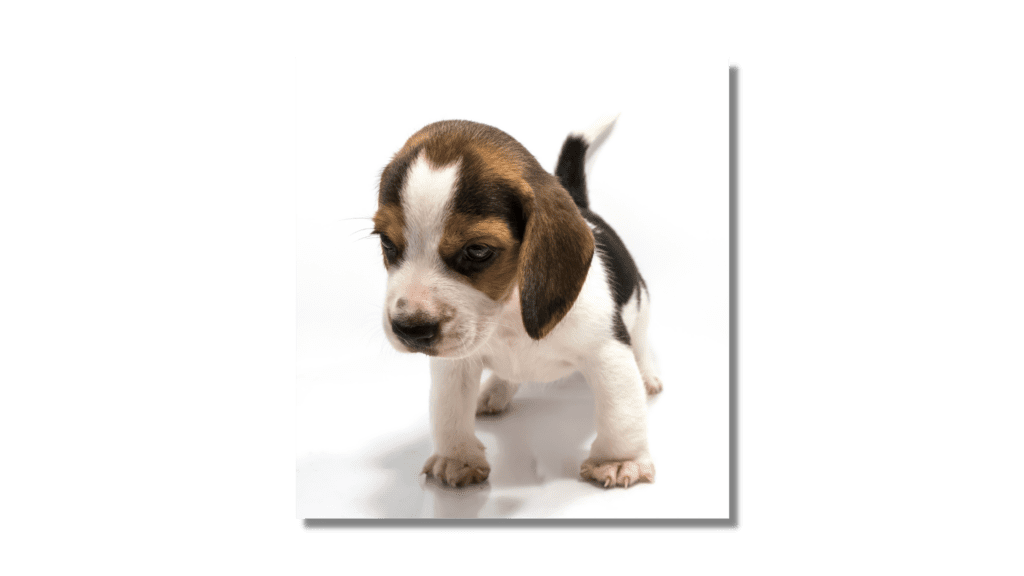
A drop shadow is a graphic and visual effect used to make your image pop out. It gives an image dimension by making the object appear to lift off the surface of the background. The blur filter helps to create this effect. The shadow is placed behind the object and only part of the shadow layer should be visible.
Creating a drop shadow in Canva
There are two ways to create a drop shadow in Canva. Recently Canva has added a new feature that enables you to create a drop shadow with a click of a button. It is so easy. But I am going to show you both ways so you can see the difference, the quick and easy one compare to creating your own drop shadow.
The easy way to creating a drop shadow in Canva
1. Select an image from photos or uploads

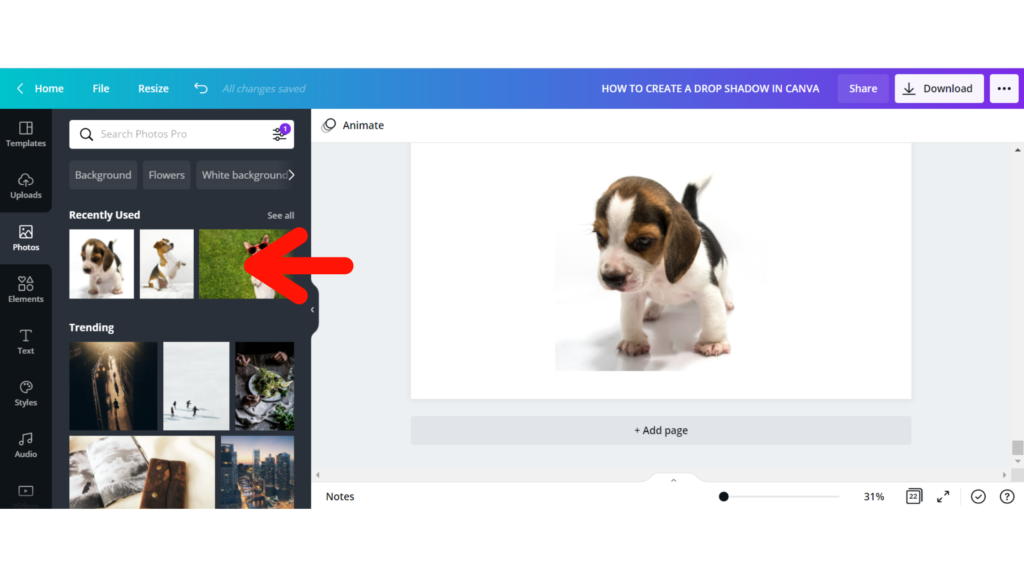
Canva offers a wide range of photos and images for both free and pro subscribers. You can also upload your own images to Canva using the upload function.
2. Edit the effects
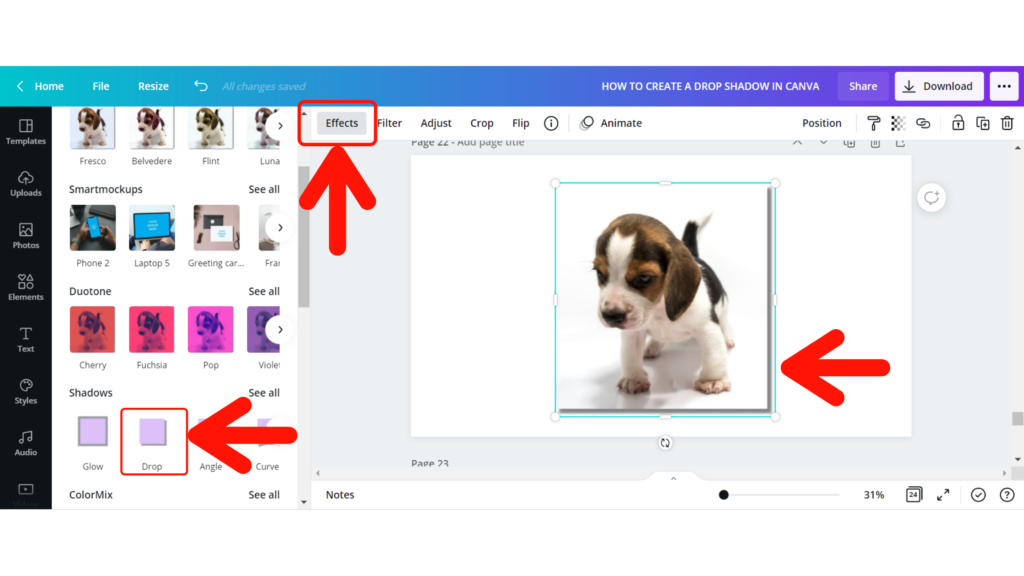
Next, we will click on the effects button at the top. In the drop-down menu on the left-hand side, you can see many different effects which we can apply to this image. Scroll down to shadows and click the drop shadow. This will then be applied to your image.
An alternative way to do the drop shadow effect
This alternative way to do the drop shadow takes a little bit longer however I feel the results are much more natural and nicer looking.
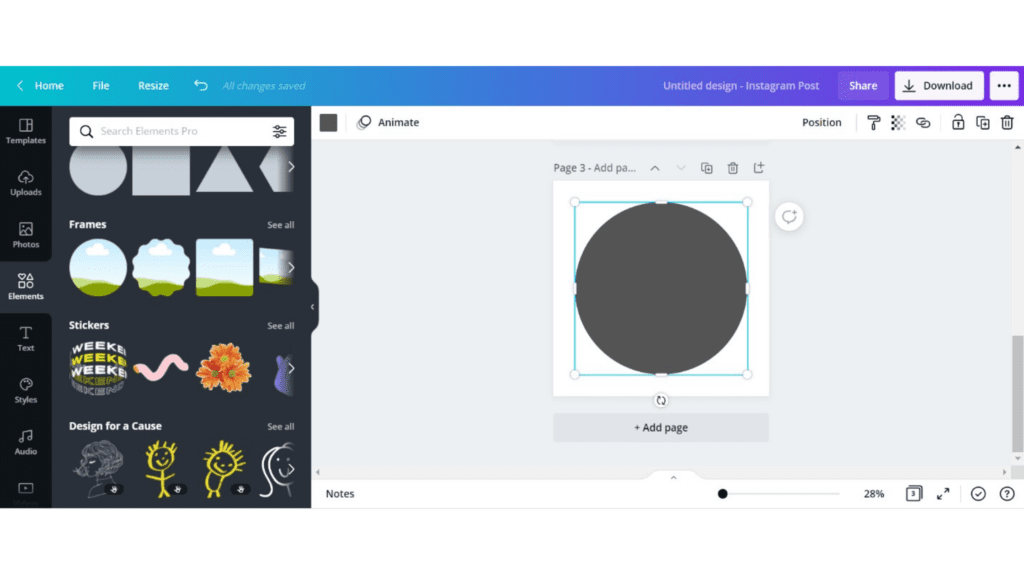
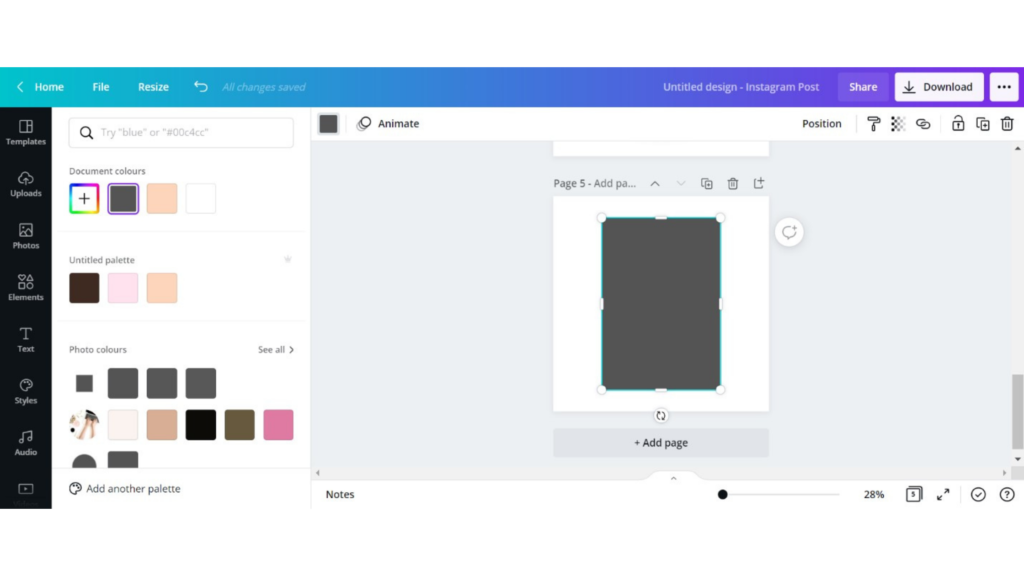
1. Choose a shape for your drop shadow.
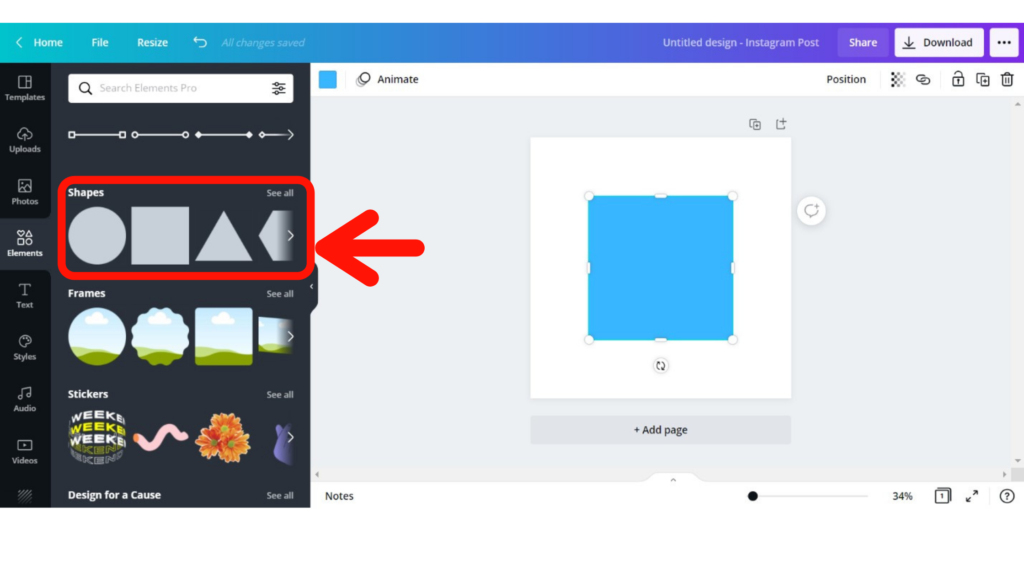
Canva offers a selection of shapes. Select a solid colored shape from the elements section that will match the shape of the image you wish to use for the drop shadow.
3. Edit the shape color
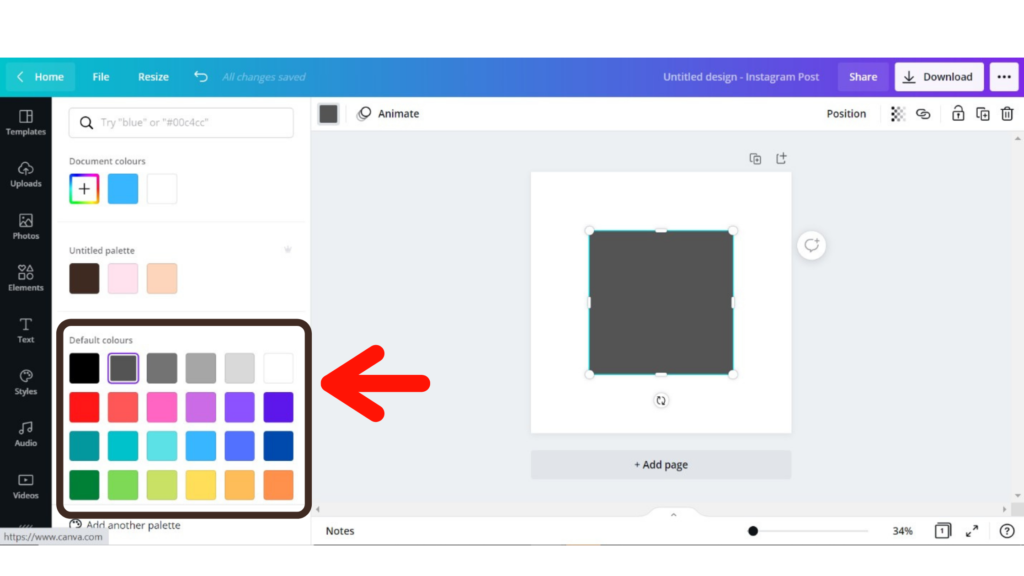
Now we will edit the shape color. Most drop shadows are a grey or black color. However, you may choose the color you wish. For this tutorial, we will use a grey.
4. Save shape as PNG
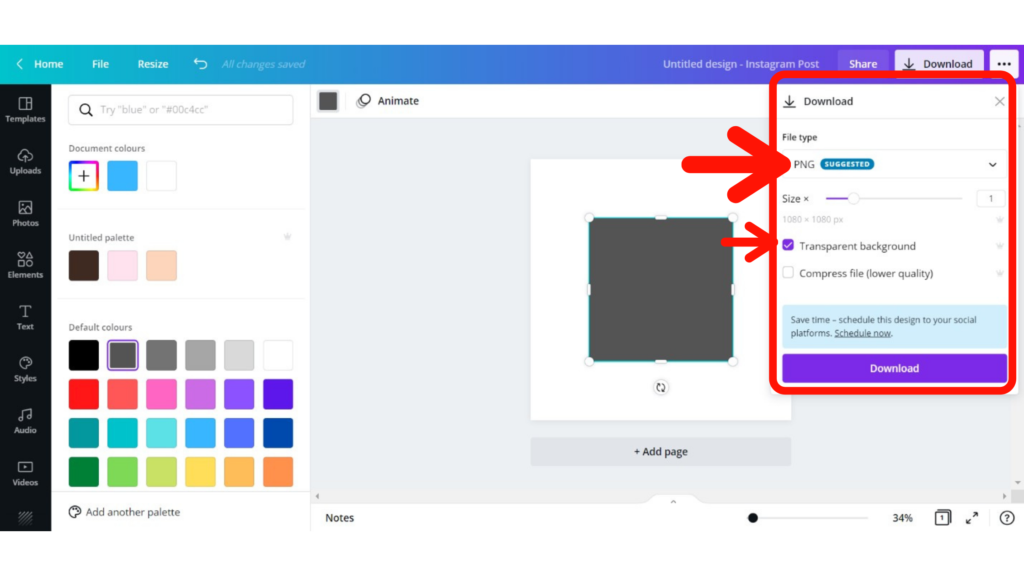
To create the shadow we need to save the shape as a PNG first. Tick the transparent background and then click download.
5. Upload image to Canva
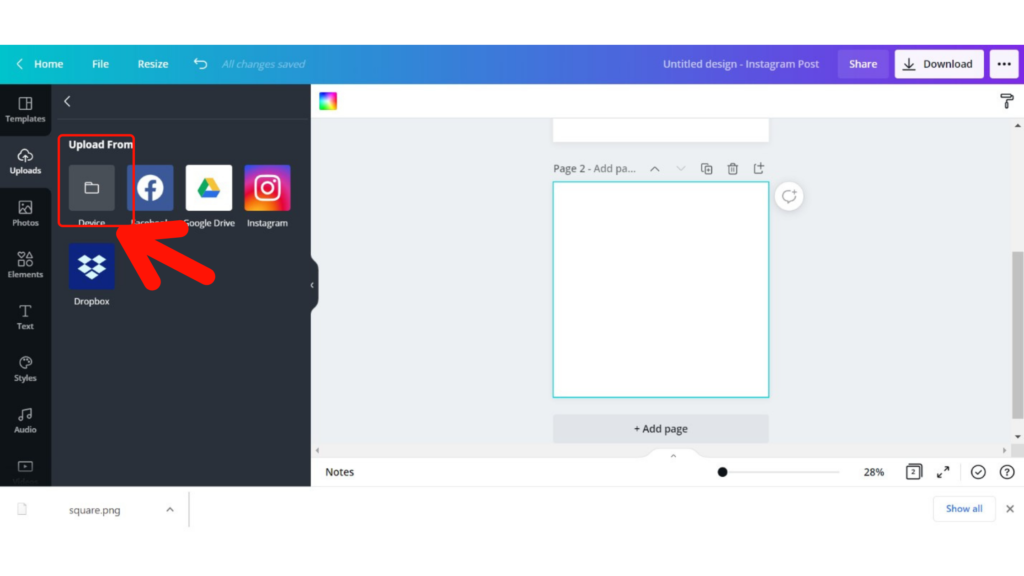
After downloading and saving the image we then need to upload it to Canva. To do this, click on upload from…
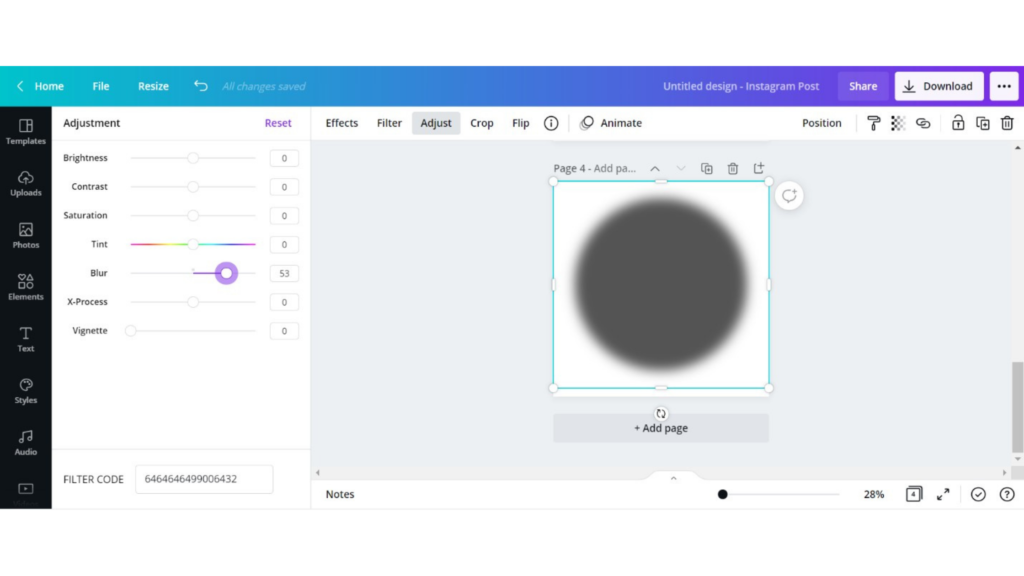
6. Adjust the blur
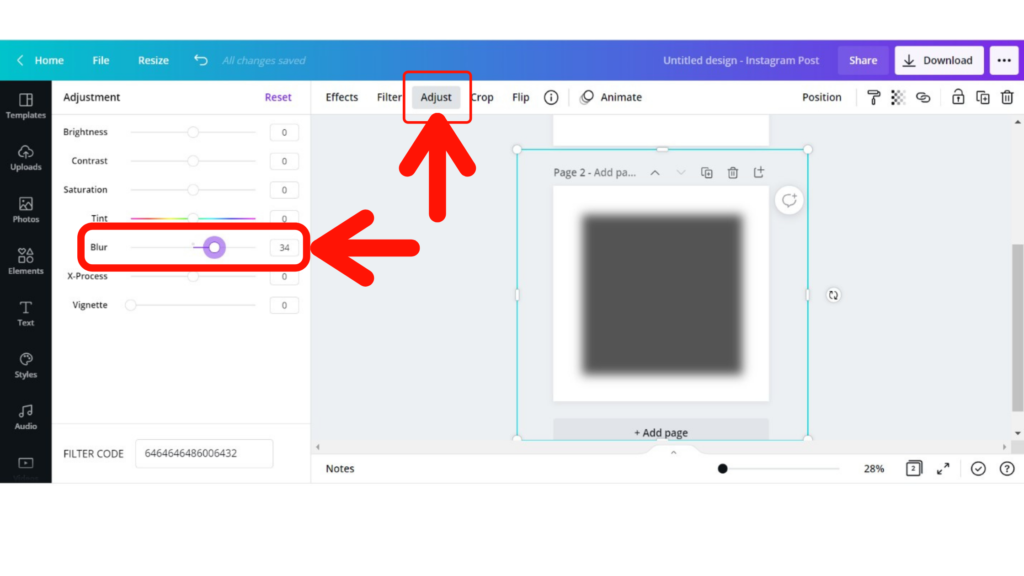
Click on your shape and select the adjust button at the top. Under the adjustment menu, increase the “blur” effect.
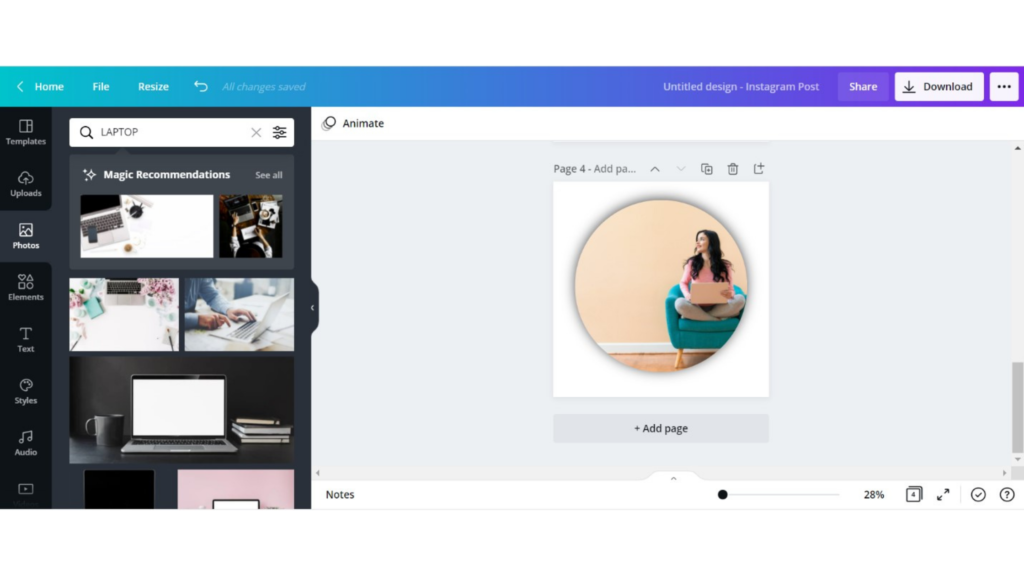
7. Add the image
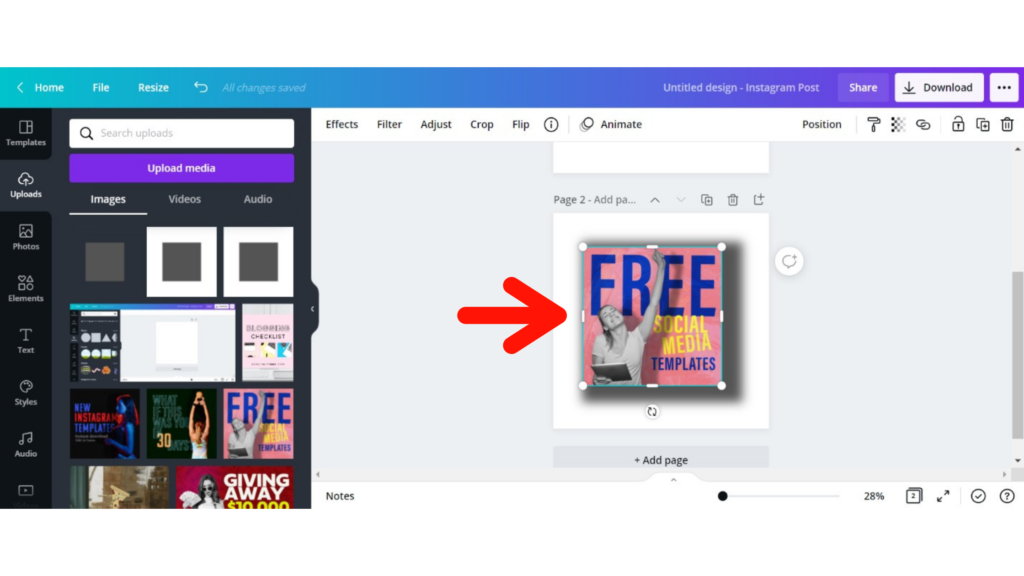
Next, we need to add our image slightly smaller than our shadow.
8 Adjust the image
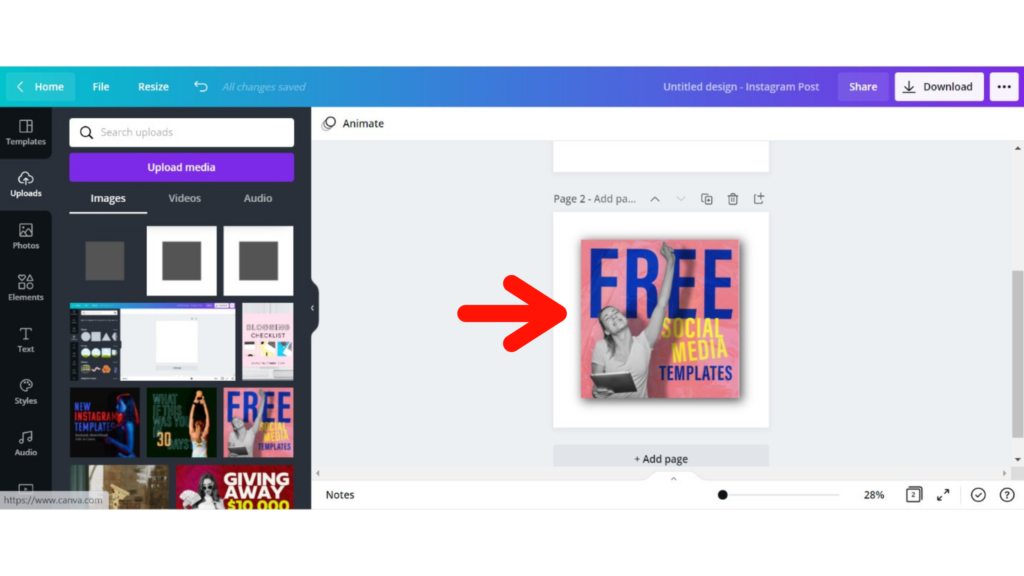
Adjust the image until the image gives the pop out effect.
10. To change the shape follow the above steps
Now you can experiment using some of the other shapes in the elements section. Just follow the above steps. Don’t forget to download it as a transparent PNG before uploading it back into Canva.
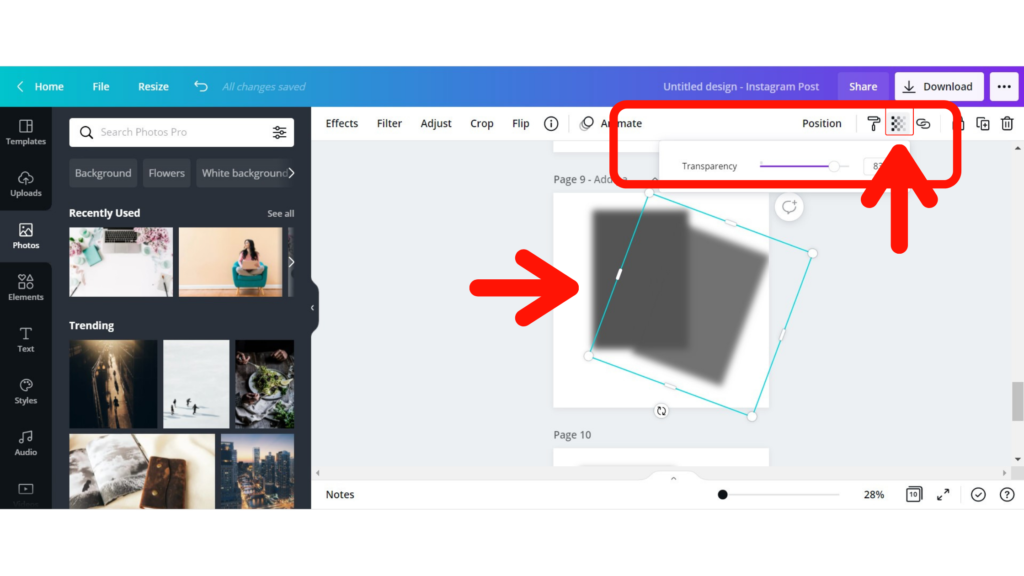
11. You can adjust the transparency
Get the free drop shadows from this tutorial
Subscribe to our email list & get the free drop shadow files. This will unlock the file and subscribe you to our email list. You can unsubscribe at any time.
If you used this tutorial and found it helpful, please feel free to leave a comment below. Thanks for stopping by